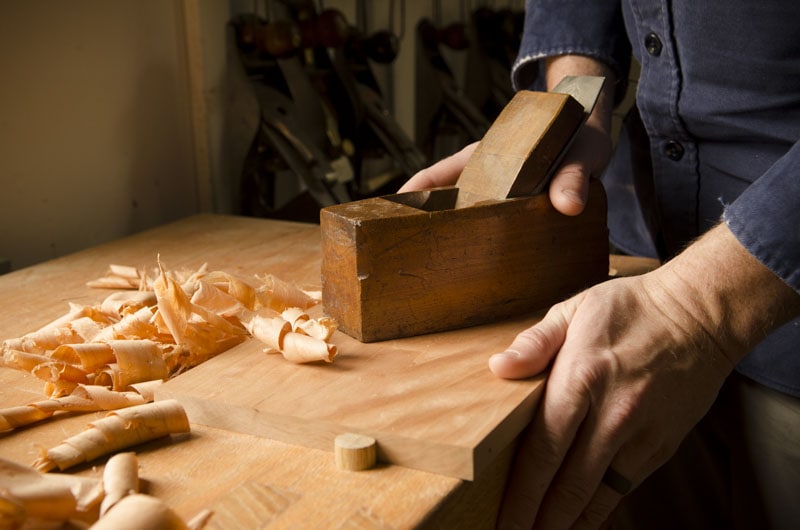
In this article we will be discussing the most important hand tools that are used for woodworking. These include plans and chisels as well as retractable steel taps and vises. We'll also cover specialized tools like the jigsaw or circular saw. We'll also cover the Jack Hand airplane. The Jack Hand plane is a medium-sized, bench plane that can temporarily replace special planes for various tasks. It can be used for roughing, joining board edges and smoothing board edges.
Planes
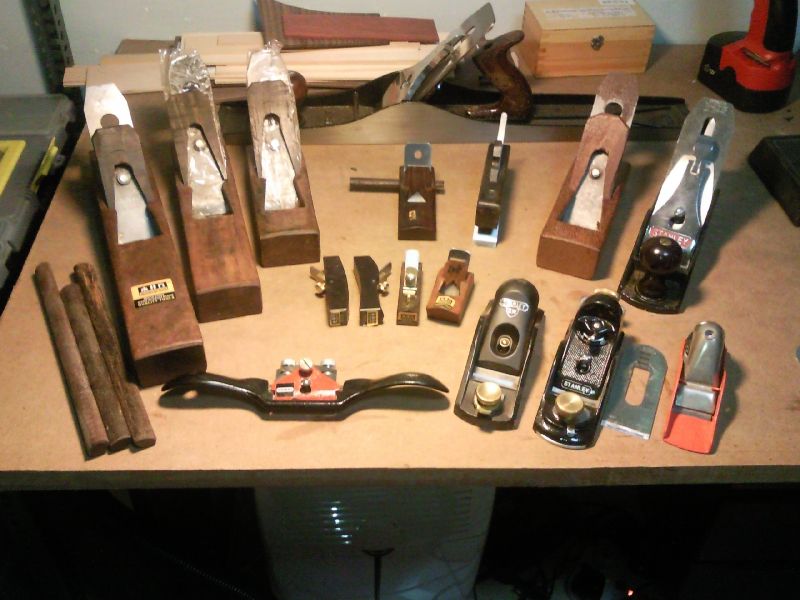
There are several types of planes available for use in woodworking with hand tools. There are smoothing or carving planes, jointer or bench planes and jointer planes. Each type is used to accomplish a different task. The smoothing plane, for example, is used to finish woodworking projects. Planes for woodworking with hand tools come in different sizes. The best size plane for your project will depend upon the task and the size of the job.
Chisels
A chisel refers to a large pointed tool that is used to carve or do other forms woodworking. They are often used to shape pieces that have been turned by a woodturning machine. The chisels can be used to create stunning works of woodwork by skilled woodworkers. However, chisels are an extremely common tool that can wear out. Chisels must be kept in a safe place to prevent any damage.

Retractable steel tapes
While they are great for your shop, they can slow down your workflow. The measuring tape blade will be the most worn, so make sure you choose a tape with a strong retraction mechanism. The blade can wear and become dull, making it difficult to read the markings. Also, consider its accuracy when purchasing a measuring tap. There are many types of measuring tapes, and some are more accurate that others. Choose one with the highest accuracy rating.
Vises
If you are serious about woodworking, you should get yourself a vise. The most commonly used type of vise is a front vise. It can be purchased just for this purpose. These are easy-to-install and do not require any technical skills. These are also known as front vises. They can be used to attach end vises. Hardware includes the screw and guide bars as well as the wood jaws. The wood must be bought separately, however.
Clamps
There are many woodworking clamps available. The best way to make your projects easier is by choosing the right one. You can easily identify the type, size, and shape of these clamps. The manufacturer's handbook will help you to identify the best one for you. Below are some key considerations before you purchase a clamp. A clamp can make your life easier and more accurate.
Screwdrivers
Screwdrivers first appeared in 1812 and have been evolving over time. They are squarer and rounder than their predecessors. Their heads have four additional points of contact that allow for significant torque to be applied during driving. Pozi screws are much more difficult than phillips screw. Modern screwdrivers typically feature a magnetic tip to aid in extraction. They are hexagonal in cross section and have a pear-shaped handle made of wood.
Grippers
Grippers are hand tools for woodworkers that are particularly useful when you are working with a European style saw. Grippers are able to grip the off-cut pieces as well the prescribed cut. This prevents burns from kickbacks. To keep the gripper level, the L-bracket can be used. Before using it, measure its height with a micrometer and mark it with chalk. It should be cut according to the instructions.
Knives
The purpose of a knife for woodworking is to cut the surface fibres of wood, making a cleaner cut. A pencil line is commonly used for woodworking. However, a sharpening a lead pen is not necessary. This allows for some variation when marking lines. It can affect the quality and strength of joints.
Drills
Power and torque are important factors when choosing a woodworking drill. It is not necessary to have a high-torque drill. Consider what you intend to use it for. Choose a drill machine with the appropriate power and torque for the task. Variable speed ranges allow for greater control and more precise drilling. This is especially beneficial for those who are interested in DIY projects, since they can adjust the speed to achieve various results.
FAQ
How much does a hobbyist need to invest in getting started?
You will need capital to purchase the tools and supplies you need to start your woodworking business. Start by getting a small circular saw saw, drill press or circular saw. These items are affordable so you won’t break the bank.
How much money do you need to get going?
There are no exact numbers because every project is different. Here are some factors to help you estimate how much money you will need.
-
Material costs
-
Tools and equipment
-
Time spent on the project
-
The hourly rate
-
How much profit can you anticipate to make
-
You can hire help, regardless of whether you have a plan.
Start small, if possible. You can make simple boxes or picture frames if you're just getting started. You'll become more proficient as you get experience.
What tools should you start with to become a woodworker
Woodworking is an art. It requires patience. It takes time and practice to master the various techniques and tools required for woodworking.
There are many kinds of woodworking equipment currently on the marketplace. Some prefer to use power tools, while others prefer to use hand tools.
While you have the option to pick what you like, it is essential that you get the right tool for the job. Start with a basic set if you don’t have any previous experience.
You might also want to learn how a router works, which allows you to cut wood into intricate shapes. These can be found at most hardware shops.
Statistics
- The U.S. Bureau of Labor Statistics (BLS) estimates that the number of jobs for woodworkers will decline by 4% between 2019 and 2029. (indeed.com)
- The best-paid 10 percent make $76,000, while the lowest-paid 10 percent make $34,000. (zippia.com)
- Most woodworkers agree that lumber moisture needs to be under 10% for building furniture. (woodandshop.com)
- In 2014, there were just over 237,000 jobs for all woodworkers, with other wood product manufacturing employing 23 percent; wood kitchen cabinets and countertop manufacturing employing 21 percent. (theartcareerproject.com)
External Links
How To
How to stain wood
The process of staining wood involves the application of chemicals to the wood's surface, which causes it to change its color. This chemical reaction causes the wood color to change from white and brownish red. The most common type of wood used for staining is oak, although many other types of wood can be stained.
You can apply wood stains in many different ways. One method involves mixing the stain and a solvent and then spraying it on the wood. Another method involves applying a solution of water to the wood. You can mix stains into varnishes or paints to make them part of your finish coat.
Preparing the wood surface is the first step to staining it. Cleaning the wood thoroughly removes any dirt or grease that could interfere with applying the stain. Sanding the wood removes scratches and imperfections. Next, you need to decide which stain you want. There are two main kinds of stains available: non-penetrating stains and penetrating. Penetrating and non-penetrating wood stains penetrate deeper than other types, making them perfect for dark colors like mahogany. Penetrating stains are best paired with lighter colors, such as maple.
You will need to decide on the type of stain you want to use, and then prepare your tools. Because you can spread the stain evenly with a paintbrush, it is ideal for applying them. You should also have some handy rags to wipe up excess stains after you finish painting. If you intend to mix the stain yourself you will need enough containers to hold all the components.
After you have prepared your materials, clean the area you intend to stain. To remove dirt and dust, use warm water and soap. Wipe the entire piece of furniture with a rag dampened with clean water. Take care to remove all debris and dirt, especially if you are planning on staining darker wood.
Apply the stain next. Apply the stain by brushing or spraying it onto one side of the furniture. You should work slowly and carefully. Continue moving along the grain until you reach your opposite end. You must be careful not to allow the stain to drip off the wood's edges. Before proceeding to the next step, let the stain dry thoroughly.
Protect the painted surface with a coat polyurethane paint sealant. Apply three coats polyurethane sealer. Let the third coat dry overnight before you sand the final coat.