
This eBook will help you learn nine key woodworking tricks that have been used by professionals. For each technique, you'll find detailed instructions and videos. Also, learn how you can make the Dovetail Jig. This eBook will show you how to make a perfect dovetail every single time. First, let's look at the common mistakes beginner make. These mistakes can be avoided by reading on.
Dowel trick
One great trick in woodworking is the Dowel trick. It is a great tool to use when drilling holes in your boards. You can also dry fit two pieces of lumber by using the ends on a dowel as a central point. To dry-fit two pieces of wood, insert the dowel into each board's hole and make sure that the dowel centers line up with each other.

Cleaning up glue
Glue is a handy tool for woodworking, but its cleanup is an art in itself. While glue can be used to clean your hands, you should not soak your work in sawdust. This can cause wood swelling. Avoid getting glue on your work. You will see the results when you are done. Use sawdust instead to create a barrier between glue and wood.
Story stick
Measuring accurately is one of many tricks in the woodworking trade. A story stick will help you see any obstacles to base cabinet placement, including any walls, plumbing, and wiring. It can help you decide where to place your cabinets by identifying the obstructions. You can make your projects more manageable by using a storystick as a template. Here are more tricks to making woodworking with story sticks easier:
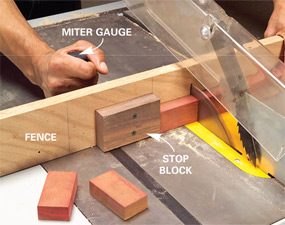
Dovetail jig
You can use the dovetail joint jig in woodworking. It can be used to make many different types joint with one tool. The jig works both indoors and outdoors. The jig is strong and won't heat up even when it is used often. Although it can be bought in many styles, it is important that you remember that dovetail jigs are more versatile than they cost.
Toenail trick
The toenail tactic is a woodworking technique that will help you save lots of time. Frame a piece by knowing where to start and what angle to place the nail. Start the nail at a 45 degree angle and angle it down. This is done by placing your toe on the board and visualizing the nail's path. Hold the board with your toe and drive the nail in the right angle.
FAQ
How do you calculate woodworking costs?
It is essential to calculate costs as accurately as possible when pricing any project. Always ensure you are getting the best possible price for materials. It's also worth taking into account all the other factors that may affect the cost of your projects, such as time, skill level, and experience. You can find an estimate of the cost of different woodwork projects in our guide to common DIY tasks.
Is it difficult to start my woodworking business?
It is difficult to start your own woodworking company. There are many regulations and legal requirements that you will need to comply with. But, this doesn't mean you need to go through all of the trouble of setting up your business. Many people choose to join existing businesses. You will only have to pay membership fees, taxes, and other charges.
What types of woods are best for furniture making?
Woods are classified according to their hardness. Softwoods include cedar, pine, cedar, and Cypress. They're often used for outdoor furniture because they don't rot easily. The hardwoods include teak, maple, mahogany and oak. Because they can't weather outside, they're usually used indoors.
How do I get started as a woodworker?
Woodworking is an art. It requires patience. It takes time and practice to master the various techniques and tools required for woodworking.
There are many different types of woodworking equipment available on the market today. Some prefer power tools while some prefer hand tools.
While you have the option to pick what you like, it is essential that you get the right tool for the job. Start with a basic set if you don’t have any previous experience.
You might also want to learn how a router works, which allows you to cut wood into intricate shapes. These can be found at most hardware shops.
Statistics
- The U.S. Bureau of Labor Statistics (BLS) estimates that the number of jobs for woodworkers will decline by 4% between 2019 and 2029. (indeed.com)
- Most woodworkers agree that lumber moisture needs to be under 10% for building furniture. (woodandshop.com)
- Average lumber prices rose about 600 percent between April 2020 and May 2021. (familyhandyman.com)
- If your lumber isn't as dry as you would like when you purchase it (over 22% in Glen Huey's opinion…probably over 10-15% in my opinion), then it's a good idea to let it acclimate to your workshop for a couple of weeks. (woodandshop.com)
External Links
How To
How to stain wood
Staining wood refers to applying chemicals to wood's surface. This chemical reaction causes the wood to change in color. This chemical reaction causes the wood color to change from white and brownish red. While oak is the most widely used type of wood for staining purposes, other types of wood are also available.
There are many options for applying stains to wood surfaces. Some methods involve mixing the stain with a solvent (such as turpentine) and then brushing or spraying the mixture onto the wood. Another method involves applying a solution of water to the wood. Stains can also be mixed into paints and varnishes, becoming part of the finish coating.
Preparing the surface for staining wood is the first step. The wood must be thoroughly cleaned to remove all grease and dirt. Sanding smoothens any scratches or rough spots. Next, you need to decide which stain you want. There are two main kinds of stains available: non-penetrating stains and penetrating. Penetrating stains penetrate deeper into the wood than non-penetrating ones, making them ideal for dark colors such as mahogany. The best non-penetrating colors are those that work with light colors like maple.
Once you have decided on the stain type that you want, get your tools ready. Paintbrushes are great for applying stain because they allow you to evenly spread the liquid across the surface. To remove any stains left behind after painting, you will need some rags. If you are planning to mix your stain, ensure you have enough containers for each component.
After you have prepared the materials, you can clean the area where you want to stain the wood. You can remove grime and dirt with warm water and soap. Wipe down all furniture pieces with a dampened cloth and clean water. If you intend to stain darker wood, make sure you get rid of any debris.
The stain should be applied next. Begin at one end and spray or brush the stain on the wood. Slowly and carefully work your way along the grain to reach the opposite end. Keep the stain from dripping off the wood's surface. Allow the stain to dry completely before you move on to the next step.
Apply a clear polyurethane sealant to protect the painted surface. Apply three coats with polyurethane. Let the third coat dry overnight before you sand the final coat.