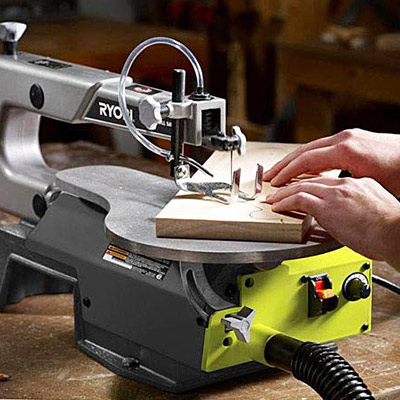
How does a sanding scroll saw work? Here are some tips to help you use your scroll saw correctly. Position your hands in the proper positions, keep the wood firmly on the table, plan your cuts, and sit at the correct height. Use the right tool. Here's a video to get you started. Follow these steps to get started. This video will hopefully help you become a scrollsaw master!
Setting the right speed for sanding scroll saws
Your scroll saw's blade and blower must be installed. Depending upon the type of cut that you are making, the blower should point at the blade. Prepare your scroll saw by making sure that the belt is secure and that lubrication has been applied. This is important for sanding. However, you can adjust the blade to get the desired finish.
You must first examine your blade in order to set the correct speed for sanding. A properly balanced tool won't vibrate very much. The blade should be sharp and thin. If it appears blurred, the blade is out of whack. Set the scroll saw to a slower speed if it is not cutting the material well.
Making on-the-spot turns with a scroll saw
The scroll saw offers unparalleled control when cutting but you need to be careful. First, ensure the wood is dry before you start using it. Next, take a look at the grain patterns. Tape can also help keep the blade straight. Once you are done, remove the tape from the cutting area and sand the edges. After you are done, spray some lacquer. Scroll saws can be a dangerous tool, so follow these safety precautions.
Once you've decided which cuts you want to make with a scrollsaw, you will need a template. To avoid the blade from veering off of the line, leave some "positive" spaces. Start by marking the pattern with pencil. Once you have the pattern, adjust the gear. Follow the instructions on the scroll saw to guide your project. Use the smallest available blade size but be careful not to veer off.
Using a pinless sander to sand a scroll saw
The use of a pinless grinder on a scrollsaw is simple. Most scroll saws have a belt that you can change to smooth the edge of the cut. The belt can fit most 5-inch scroll saw models. The belt can also be used to correct wandering cutting lines or to remove burns. There are many options for belts that can be customized to meet the specific needs of your scrollsaw.
Pinless sanders are compatible with most scroll saws and conversion adapters. They attach to the blade's end just like a Plain End or Pinned blade. To make one, just remove the pivothead. Simply install the adapter to convert the Pin-End sander into a Pinless one and then change the blade.
A sanding belt is used to sand scroll saws
A scroll-saw sanding tool belt can improve the quality of your woodworking projects. These belts can be mounted on all models of scroll saws and are made from durable plastic. These belts are ideal for larger woodworking projects like tables, countertops, and cabinets. They can remove bumps and correct wandering cut. These belts come in either 1/4"- or 1/2" widths. They are also available in 80, 120, 180, and 220 grits.

A quality sanding belt can smoothen the edges of your scroll see and be used with a wide range of materials. A variety of grits is a good thing. A good gritbelt should be at minimum half an inches wide. It should work with scroll saws that have a 5 inch blade.
FAQ
How can a beginning woodworker make a living?
Many people are beginning to learn how build furniture to launch an online business. You don't have to sell on Etsy if your furniture is just beginning. Sell at craft fairs or other local events. Offering workshops could be another option for those who are interested in learning how to build their furniture. Consider offering your services if you have previous experience as a builder or carpenter.
Where can I begin with woodworking
Building furniture is the best way to learn how furniture is made. While you will need tools, mistakes are inevitable, but you will learn the ropes if you persevere.
You should first choose the project you wish to complete. You could make something as simple or complex as a box. Or you could build a whole entertainment center. Once you've settled on a project find a local skilled woodworker. Ask them for suggestions on the tools you will need and where to buy them. Ask if you can find someone who does this kind work.
How long does it take for furniture to be finished?
It depends on the type of wood you choose, the complexity of the design, and the amount of finishing you apply. Hardwoods, on the other hand, are more durable than softwoods. Hardwoods tend to be more expensive that softwoods. They are more durable and can withstand moisture better. The typical time taken to finish a piece furniture takes anywhere from one to three month.
What tools should you start with to become a woodworker
Woodworking is an art that takes patience and practice. It takes time for you to master the different techniques and tools that are required to woodwork.
There are many woodworking tools on the current market. Some prefer power tools while some prefer hand tools.
It's your choice. But you should ensure that you pick the right tool. Start with a basic set if you don’t have any previous experience.
A router is a tool that cuts intricate shapes in wood. You can also learn how to use it. These tools can be purchased at most hardware stores.
How do I organize my shop?
Setting aside an area to store tools is the first step in keeping your workshop organized. You want your tools to stay clean and free from debris and dust. Pegboard hooks can be used to hang tools and accessories.
Statistics
- Woodworkers on the lower end of that spectrum, the bottom 10% to be exact, make roughly $24,000 a year, while the top 10% makes $108,000. (zippia.com)
- Average lumber prices rose about 600 percent between April 2020 and May 2021. (familyhandyman.com)
- Overall employment of woodworkers is projected to grow 8 percent from 2020 to 2030, about as fast as the average for all occupations. (bls.gov)
- The U.S. Bureau of Labor Statistics (BLS) estimates that the number of jobs for woodworkers will decline by 4% between 2019 and 2029. (indeed.com)
External Links
How To
How to make wood joint
This tutorial will demonstrate how to join two pieces together of wood. We will use the "pockethole joint," which means that we drill holes in the wooden pieces and then glue them together. This works well if the wood is straight and smooth. If your wood isn't straight or flat, you might want to try another method, such as dowel joinery. Here are the steps
-
Drill Pocket Hole Joints. You will need to measure and mark the exact location of your pocket hole joint. Then drill 3/4 inch deep holes into the ends of each piece of wood using a jig saw or handheld drilling machine.
-
Sand Smooth. Sanding the edges of the wood will help to prevent the joint from splitting later.
-
Glue together. Apply glue to both ends of the wood. Let the wood sit for 5 minutes, then clamp it together.
-
Attach the Pieces together. After the glue has dried properly, clamp the pieces together to make sure they are flush.
-
Trim Joinery. After the glue dries completely, trim off any excess wood around the joint.
Allow enough space between pieces so you can turn them inside out.