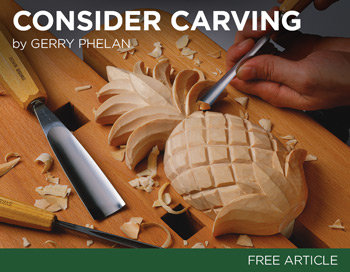
If chip carving has ever been something you've wanted to do, you know how difficult it can be. There are many different styles and techniques that you can try, but which one is best? What tools do you need? Here are my tips and tricks to carve chips. I hope this helps you decide what one is best for you. There are many essentials to chip carving success, regardless of whether you prefer traditional or modern style.
Traditional
Chip carving is one of oldest forms of woodcarving. It requires a straight-edged knife but a skew-ground or offset blade knife can also be used. Chip carving involves making numerous small triangular holes in the wood to create a pattern. This art form began over 1,000 years ago and evolved simultaneously in many different lands. Due to its popularity, many of the designs were so similar across cultures that it was hard to distinguish one from the other.
As the practice spread throughout the world, the skills required to carve wood were passed down from generation to generation. Chip carving was an art form used to decorate furniture in Sweden. Schools were created to teach the art. Modern chip carvers benefit from centuries of experience and the skills of carvers. Over the years, knowledge and experience was passed from apprentice to student. It is a process that lasts a lifetime and continues to this day.
No cost for form
You've come to right place if you've ever wanted to learn chip carving. Murray Taylor has created a DVD that shows you how create both freeform and geometric carvings. It's a good introductory project and contains lots of useful information. English and NTSC formats can be found. The DVD is also available in widescreen and stereo. Artisan Media Ltd. is the owner of DVD. It is also available in MP4 format for Windows or Mac computers.
Triangles, circles, lines and lines are the fundamental shapes for geometric chip carving. The technique allows for unlimited shapes and patterns and can be used to combine different styles. This method of chip carving is also called freeform chip carving. Your chips can be any shape you like, from a flower to a dragon. You can incorporate multiple techniques into one piece by free-form chip carving.
Techniques
Since centuries, chip carving has been a popular art form. Examples can be found in countless countries throughout the world. In the South Pacific Islands, for example, chip carving has been found on boat paddles and ceremonial tool handles. These carvings were most likely done using bits of bone and sea shells, but some people have reported using shark teeth as well. This book shows how to create stunning designs using a variety chip carving techniques.
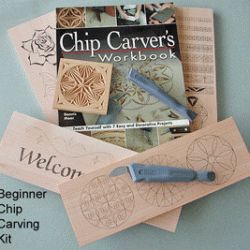
Chip carving is easy if you know how to follow a few simple techniques. This includes learning how to carve the fine triangle. This pattern is simple to follow and understand. This pattern is easy to carve. You simply need to cut various triangles, and then repeat the process. It doesn't have to be boring. Simply by changing the angles, you can create amazing patterns.
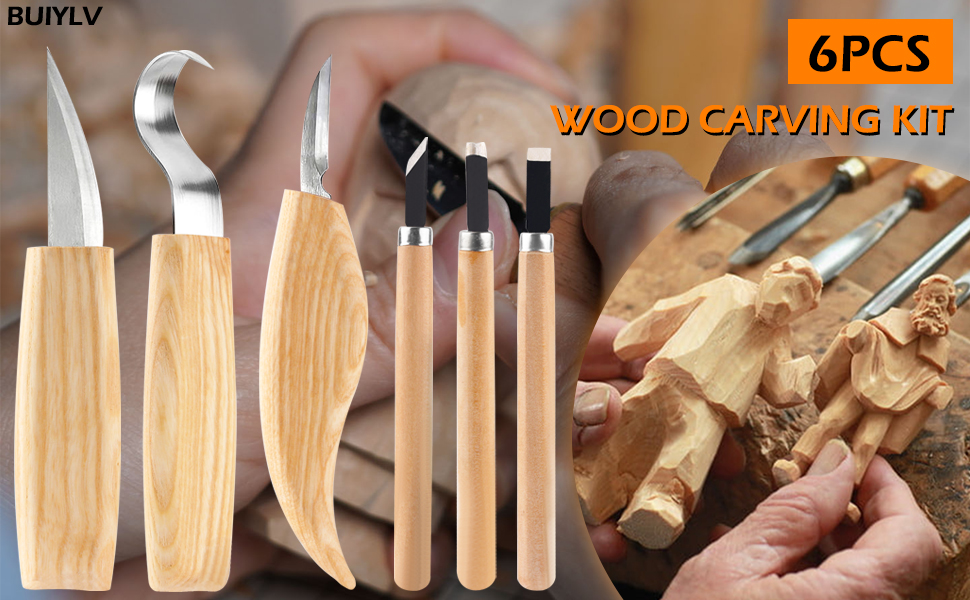
Tools
Lora S. Irish offers a free online seminar that will teach you the basics of chip carving. She teaches you how to use various carving tools and supplies, including a chip knife, stab knife, and detail bench knife. In this free seminar, Irish also covers the different types of wood carving tools. You can choose from the list below to purchase the right tool for your carving needs. These tools can create simple shapes and designs. Or, you can work more intricately to create more intricate designs.
Special geometry is used to create a chip carving knife. It is approximately 1 1/2 inches long with a narrow back edge. This makes it easy to make precise cuts. A sharp point is essential to ensure that edges meet perfectly. The chip carving knives are made from stainless steel with a sharp tip. A chip carving knife should be sharp enough to cut a sliver of wood.
Getting started
First, learn about chip carving. The method you choose will depend on the type and purpose of your carving. You should still be familiar with some principles in order to make sure your work is as precise as possible. Chip carving is the art of cutting fine patterns in wood. Follow these steps for your first chip carving:
Sharpening a chip carving blade is crucial. Chip carving knives will have bevels along their blades, which indicates they are primary chip carving knives. The sharpening stone is shaped like a diamond and can produce efficient edges. The stone should be placed at 10 degrees. The stone will both sharpen and shave the chip carving knives and tool simultaneously.
FAQ
How do I identify the type of wood that I am dealing with?
Always verify the label on wood purchases. The label should detail the wood species, its moisture content and whether it has been treated or not.
Where can I locate free woodworking plans
Woodworking plans can be found online without the need to purchase books or magazines. You only need to Google search. Enter "free woodworking", and you will see hundreds upon hundreds of websites offering free plans.
Where do I get my woodworking supplies?
There are many places where you will find everything that you need. For example, you could visit local hardware stores or look online at websites like Amazon.com.
You might also consider flea markets and garage sale for any old furniture or other materials you could reuse.
How do I get started with woodworking?
It is best to actually build furniture to learn how to make it. While you will need tools and make mistakes, you will eventually master the art of building furniture.
You should first choose the project you wish to complete. It can be something as simple and small as a box, or large-scale as an entertainment center. Once you've decided on a project, find a local woodworker who specializes in that kind of work. Ask him or her for advice on what tools you'll need and where to find them. You might even ask whether there's someone else you can talk to who does this kind of work.
What would you recommend as a starting material for woodworking?
Start off with softwood like pine and poplar. Once you feel comfortable with these two, move on to hardwood.
Statistics
- Woodworkers on the lower end of that spectrum, the bottom 10% to be exact, make roughly $24,000 a year, while the top 10% makes $108,000. (zippia.com)
- In 2014, there were just over 237,000 jobs for all woodworkers, with other wood product manufacturing employing 23 percent; wood kitchen cabinets and countertop manufacturing employing 21 percent. (theartcareerproject.com)
- Average lumber prices rose about 600 percent between April 2020 and May 2021. (familyhandyman.com)
- The best-paid 10 percent make $76,000, while the lowest-paid 10 percent make $34,000. (zippia.com)
External Links
How To
Here are some tips on how to drive nails in wood
It is essential to pick the right size and style of hammer before you can drive a nail in wood. There are many types of hammers that you will find: claw hammers and sledgehammers; mallets; ball peen hammers; and hatchets. Each type of hammer has its pros and cons. A claw hammer, for example, is the best choice if you need to hit nails hard. However, it's not easy to know exactly where the impact will land. A sledgehammer is useful for striking large areas at once but too heavy to be effective for smaller tasks.
Once you have chosen the right hammer for you, put your hand flat against its side so that it rests comfortably in the palm of your hand. Hold the handle in your hand, but don’t force it too hard that you break. Your wrist should be relaxed while you hold the hammer straight upwards. Now, move the hammer towards the center of the nail by swinging it back. You should feel the impact of your hammer hitting the nail. If you're having trouble getting the hang of swinging a hammer, practice with a block of wood until you get the rhythm down.
Hold the hammer near your body until you're ready for the nail to be driven. Place the nail so that it is perpendicular with the wood's surface. Your eyes should be focused on the nail's tip. Move the hammer forward and then continue to move the hammerhead. You can repeat this several times, increasing your swing speed. Once you've mastered the technique, try adding power to your swings. You can hold the hammer over your shoulder and forcefully bring it down. You'll have more energy to work with.
Once you have successfully drilled the first hole in the nail, remove the hammer. Use a pry bar or screwdriver to pull out the rest of the nails. To prevent splitting the wood, ensure you keep the nail heads flush against the board's surface.