This is the place to learn how to carve wood-carved caricatures. This section will teach you about safety, design, and techniques. A standard caricature can be transformed into a masterpiece. If you're unsure how to start, read on for some tips to make your caricature as unique as possible. A class with a caricaturist is also an option.
Techniques
Wood carving caricatures are a unique form of sculpture. They're amusing and can tell a story without words. Caricature can be described as an exaggerated depiction of a real person. Dave Stetson, wood carving carvers, has a strict code that ensures realistic representations of real people. They also have specific rules that must be followed in order to create effective caricatures. This article will give you tips and the basics of carving caricatures.
First, the technique to carve an astronaut requires focus. A spoon carving knife or the whittling blade are required to carve an astronaut. They are both delicate tools. To make the job easier, you can use templates while you are carving the astronaut. A good tutorial will guide you through the process of creating your cartoon. If you are on a limited budget, you may consider buying a tutorial.
Designs
There are many methods to make wood-carved caricatures. It is a good idea to use a pattern. A cardboard cutout can be purchased and used to carve different types of caricatures. The steps for a caricature-carving tutorial can also be used. This article will provide information on the best methods and designs to carve a caricature.
Fred's first caricature was titled "Aristocrats of the Roads". It featured two men-wanderers. It was made of Honduras Mahogany. Fred entered it to competitions, and won numerous awards. It was also featured in the Chipping Away Catalog. Fred carved another Luciano Pavarotti caricature, which earned him a Second Place Winner Award at the national woodcarving convention.
Eyes
It is important to ensure realistic looking eyes when carving caricatures. Although it is fine to have realistic looking eyes, the lack of enough detail can cause viewers to be dissatisfied. Take a picture of an existing carving to ensure that your eyes align properly. Then, follow the steps in the photograph.
Next, you need to decide the shape of your eyes. Some carvers use the identical eye shape to create their eyes. Other carvers create more convincing eyes by using different shapes. You can make your eyes symmetrical by using stop cuts to cut the lower eyelid. Finally, you'll need to carve your pupil and iris. After you have completed these details, you can move on to carving the caricature.
Safety
Wood carving caricatures are unique in their designs. They can tell a story without words, and the artists that create them take great care to ensure the accuracy of their work. Caricatures are depictions of people and objects that are exaggerated to communicate an impression, or humor. Dave Stetson, a wood carving carver, has set strict guidelines for safety and quality. He also provides information to consumers.
Before carving a caricature, first, clean the wood and remove any pencil marks. The surface can be cleaned with water and dish soap. The 60-degree V-shaped tools can be used to carve the neck. A 60-degree V shape tool is useful for carving, as it cuts wood easily. Ramelson's 60-degree V-shaped Carving Tool is an excellent choice. It is very sharp and easy-to-use.
Materials
The wire and wood caricatures are a fun, challenging way to carve animal figures. Even though animal caricatures might not be as complex as human caricatures but they are still entertaining and can tell a story with no words. Caricatures have a heightened sense of reality. Carving caricatures can seem like a hard hobby, but it is possible for experienced carvers to use a variety of materials.
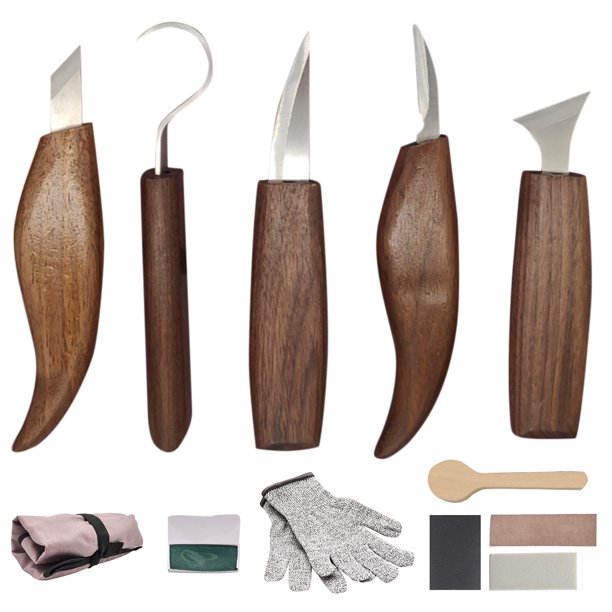
The materials you will need to complete your carving include chisels and a wood board. Also, a hammer is necessary. Acrylic white paint is the first layer of paint. You can purchase it at a craft shop. Once you've completed the base layer, the next layer can be started. This layer will consist of a golden brown paint and a few drops of burnt sienna (Academy). For the face, use 2 drops sunkissed purple.
FAQ
Which material would you recommend for woodworking lessons?
You can start with softwoods like pine or poplar. When you feel confident with these two, move on towards hardwood.
Where can I buy hardwood lumber?
You can buy hardwood lumber at Home Depot. They sell all kinds of wood products, including flooring, cabinets, furniture, etc.
You can also find a large selection of engineered hardwoods like Ipe (Araucaria Angustifolia), Brazilian Cherry, and Mahogany in their collection (Swietenia Macedonilla).
These woods can also be purchased online by simply searching Google for "hardwood timber"
Is it difficult to start my woodworking business?
It's not easy to start your own woodworking business. There are lots of legal requirements and regulations that you'll need to follow. It doesn't mean that you have to go through the entire process of starting a business. Many people join already-established businesses. This allows you to join existing businesses and pay only membership fees.
Are you looking for tips to start a woodworking company?
It's not easy to start your own woodworking business. But if you're passionate about your hobby, you won't mind putting in the effort. You'll enjoy the challenge and rewards of owning your own business.
It is important to remember that unexpected problems may arise when you start a new venture. You might run out money, or you may have to borrow unexpectedly. Perhaps customers won't pay you as much as you had hoped. Preparedness is key to survival in such situations.
It is a good idea to create a separate bank account just for your company. You will always know how much money you have coming in.
How often should I buy new supplies?
You'll probably have to replace some of your tools over time. If you're using hand tools, you'll need to sharpen them regularly. For power tools, replacement parts will be required frequently. Avoid buying too many products at once. Spread your purchases out over several months.
Statistics
- If your lumber isn't as dry as you would like when you purchase it (over 22% in Glen Huey's opinion…probably over 10-15% in my opinion), then it's a good idea to let it acclimate to your workshop for a couple of weeks. (woodandshop.com)
- Most woodworkers agree that lumber moisture needs to be under 10% for building furniture. (woodandshop.com)
- In 2014, there were just over 237,000 jobs for all woodworkers, with other wood product manufacturing employing 23 percent; wood kitchen cabinets and countertop manufacturing employing 21 percent. (theartcareerproject.com)
- Overall employment of woodworkers is projected to grow 8 percent from 2020 to 2030, about as fast as the average for all occupations. (bls.gov)
External Links
How To
How to make wood joints
This tutorial will help you join two pieces of wooden together. The "pocket hole joint" is a method whereby we drill holes into the wood and glue them together. If your wood has a straight grain, smooth surface, you can use this method. Dowel joinery might be a better option if your wood is not straight or flat. Here are the steps
-
Drill Pocket Hole Joints. Measure and mark the location where you would like to place the pocket hole joint. Then drill 3/4 inch deep holes into the ends of each piece of wood using a jig saw or handheld drilling machine.
-
Sand Smooth. The wood's edges can be sanded to prevent splitting.
-
Glue both sides together. Apply glue to both ends of the wood. Allow the wood to rest for five minutes before clamping it together.
-
Secure the pieces together. After the glue has dried thoroughly, secure the pieces so that they are flush.
-
Trim Joinery. After the glue dries completely, trim off any excess wood around the joint.
Make sure to leave enough room between the pieces so that you can turn them inside and out.