
This article will show you how to sharpen your hand plane using sandpaper. This article will also cover oilstones as well as manmade waterstones. Sandpaper is probably the easiest and best way to sharpen any hand plane. You can use a power or manmade waterstone if you aren't familiar with sandpaper.
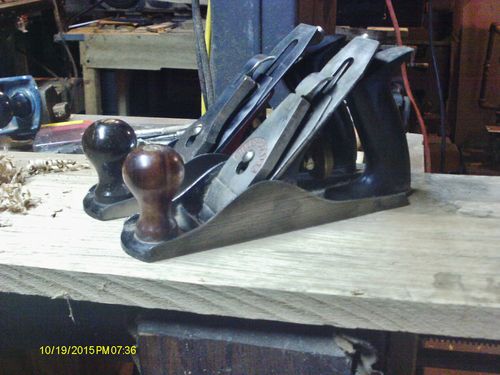
Honing a plane by using sandpaper
If you want a flat, perfect flat plane blade, hone the edge. To flatten a plane blade by hand, sandpaper can be used. This is best done with 1/4-inch thickness glass. You can also buy a cheap cutter for $10. Sandpaper should be of high quality. Low-quality paper can cut too slowly, and it wears too fast. You can also purchase a set of grits in a combination pack with a variety of different grits.

A power plane is used
Before you sharpen your hand plane, you should make sure it's disassembled, and then remove the blade and insert it into the honing guide. After you have fitted the blade into the honing device, make sure the waterstone is flat. If the water stone is not flat, you can use a Diamond honing Stone. The video below will help you do this.
Oilstones
Traditional woodworkers used three stages of sharpening. A hand grinder or power grinder was used to shape the tools. The coarse stone was then used. The last stage involves a mixture of both the coarse and the fine stones. Woodworkers may have used a leather strap to help them in some cases. This is not a good option for every day use but it can be used for occasional sharpening.
Use of man-made stones
Waterstones can be used to sharpen your razor-sharp hand plane. This method gives you a consistent and high-quality cutting edge. The main difference between oilstones or waterstones is how fast they sharpen your tools. While oilstones take longer time to sharpen hand planes than waterstones, they can do so very quickly.
Cleaning the rear contact points on a frog
Adhesion to a substrate depends on its surface energy. Wetted surfaces can reduce the surface energy, and this may increase the frog's ability to adhere to the platform. It can also increase the area of contact, increase mucus spread and reduce friction. Therefore, cleaning the rear contact points of a frog may be beneficial in improving adhesion.
FAQ
Is it possible to open my own woodworking shop?
It can be difficult to start your woodworking business. There are many requirements and regulations that must be followed. But, this doesn't mean you need to go through all of the trouble of setting up your business. Many people opt to join existing businesses instead. This way, you only need to pay membership fees and taxes.
How long does it take you to finish a piece?
It depends on what size piece of furniture you have. Smaller projects like boxes and picture frames can be finished within one day. Larger projects, such as desks and dining tables, can take several days. It takes time in order to properly stain or seal the wood.
How do you calculate woodworking prices?
The most important thing to remember when calculating costs for any project is to keep them as low as possible. You should always try to make sure that you are getting the best deal on materials. It's also worth taking into account all the other factors that may affect the cost of your projects, such as time, skill level, and experience. If you want to get an idea of what you can expect to spend on different types of woodwork projects, check out our guide to the average price of common household DIY tasks.
Where can I purchase woodworking supplies
There are many places you can get everything you need, and you don't have to go far. You could shop at your local hardware store or go online to Amazon.com.
You can also search flea and garage sales for furniture and other materials that can be reused.
How do I learn basic woodworking skills?
Building a bench is a great way to get started in furniture building. This project can be done with any kind of wood that you have at home. If you don't know what kind of wood to use, then go ahead and buy some cheap pine boards from Home Depot or Lowes. You'll need to sand the bench after it's built. Then, finish it with varnish or a stain.
How do I organize my shop?
To keep your workshop tidy and organized, you should first create a place for tools storage. Make sure your tools are clean and free of debris and dust so they can be used properly. To hang accessories and tools, use pegboard hooks.
What wooden items sell well?
The best-selling wooden items are those which have been made from wood that was harvested sustainably.
Oak, cherry and mahogany are the most sought-after wood types for furniture.
These woods are very strong, but they also have beautiful grain patterns and colors. If they are well cared for, they can last many years.
To prevent moisture damage, wood furniture should always first be painted. This applies to all surfaces, even drawers and doors.
If you want to make sure that your furniture lasts as long as possible, then you should choose a paint that is resistant to water.
Use a high-quality, oil-based primer and two coats of topcoat. Depending on how much wear you expect, you might need to apply more coats of topcoat.
Avoid spray cans and aerosol paints. These products are contaminated with solvents, which evaporate rapidly and can leave behind toxic fumes.
Statistics
- Woodworkers on the lower end of that spectrum, the bottom 10% to be exact, make roughly $24,000 a year, while the top 10% makes $108,000. (zippia.com)
- In 2014, there were just over 237,000 jobs for all woodworkers, with other wood product manufacturing employing 23 percent; wood kitchen cabinets and countertop manufacturing employing 21 percent. (theartcareerproject.com)
- The best-paid 10 percent make $76,000, while the lowest-paid 10 percent make $34,000. (zippia.com)
- Most woodworkers agree that lumber moisture needs to be under 10% for building furniture. (woodandshop.com)
External Links
How To
How to stain wood
Stain wood is a process that involves applying chemicals to the surface of wood, which changes its color. This chemical reaction causes the wood color to change from white and brownish red. Although oak is the most popular type of wood to stain, there are many other types that can be used.
There are many methods to apply stain to wood surfaces. Some methods include mixing the stain along with a solvent like turpentine and then applying the mixture to the wood by brushing or spraying. Another method involves applying a solution of water to the wood. You can mix stains into varnishes or paints to make them part of your finish coat.
Preparing the surface for staining wood is the first step. The wood must be thoroughly cleaned to remove all grease and dirt. Sanding can smoothen out scratches and uneven spots. The next step is to choose the stain type you want. There are two types of stains that can be used: penetrating and non-penetrating. Penetrating and non-penetrating wood stains penetrate deeper than other types, making them perfect for dark colors like mahogany. Penetrating stains are best paired with lighter colors, such as maple.
After deciding on the type of stain, you want to apply, prepare your tools. Because you can spread the stain evenly with a paintbrush, it is ideal for applying them. A few rags are also handy to clean up any spillages after you have finished painting. If you are planning to mix your stain, ensure you have enough containers for each component.
Once you have prepared all your materials, it is time to clean the areas where you will stain the wood. To remove dirt and dust, use warm water and soap. Use a dampened sponge and warm water to clean the entire piece. Make sure you eliminate any loose debris, especially if you plan to stain darker wood.
The stain should be applied next. Next, apply the stain to the furniture by starting at one end. Work slowly and carefully, moving back and forth along the grain of the wood until you reach the opposite end. You must be careful not to allow the stain to drip off the wood's edges. Before you proceed with the next steps, let the stain dry completely.
A coat of clear polyurethane sealing agent is applied to protect the paint. Three coats are recommended for polyurethane. Allow the third coat to dry overnight, before sanding.