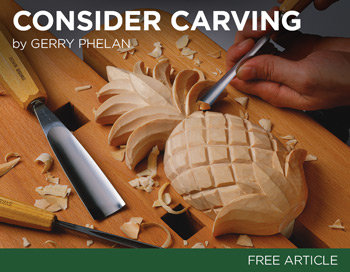
There are several woodcarving patterns that you can choose to try if you are interested. You can print these patterns, which will make the process even easier. Beginners can start out with geometric patterns. Once they feel comfortable carving, they may move on to more complicated patterns like flowers and animals. This article will show you several woodcarving patterns. These are the top patterns that you can use for learning the art.
Fine Woodworking by Dremel.
You might be interested in crafting projects and the Detailed Engraved Flower, Finewoodworking by Dremel. These rotary tools, also known as Dremels are ideal for engraving and detailing. They are very simple to use. Simply set the speed dial, and then press the button at the top of the unit. The speed dial controls how much material a tool can remove when carving a wood-surface.
Detailed Engraved Flower by Frank C. Russell
"Detailed Engraved Flower by Frank C, Russell" has been reproduced nationally and internationally. Russell's early work was heavily influenced by first-hand observations, even though his output was not completely documentary. His later works, which combine secondhand information with fictionalization, are not strictly documentary. These works are more a representation of a life that is part myth, part fact with no definitive proof of its narrator.
"Detailed Engraved Flower, Frank C. Russell", one of his earliest pieces, is a striking example of the artist’s skill. This small piece is made from an ivory grip with a bull’s head. It dates back to 1911. The image is just a few millimeters long. The artist created the masterpiece in honor of his mother, who died before him.
Tumbled Rose Detailed Engraved Flower
Tumbling rose's detailed engraved flower is a gorgeous wood carving. The flower appears simple but actually contains intricate petals. This project is great for beginners. Although the photos show only a few parts of the engraved rose, you might be able find some pieces that work better than others. Tumbled Rose's detailed engraving flowers come in many sizes.
FAQ
How much money does a hobbyist have to put into getting started?
If you're looking to start your own woodworking business, you'll probably need some capital to buy the necessary tools and supplies. A good place to start would be by buying a small table saw, drill press, circular saw, jigsaw, and sanding machine. These items aren’t too expensive so you won’t have to break the bank.
How can I keep my shop organized?
First, make sure you have a designated space for tools storage. You want your tools to stay clean and free from debris and dust. Hang tools and accessories using pegboard hooks.
What kind tools do carpenters use to build?
A hammer is the most commonly used tool by carpenters. A hammer is used for pounding nails into wood. This helps to keep pieces together when they are working on a project. Other tools include clamps.
Do you know anything more about woodworking?
It's easy to underestimate the amount of work involved in making furniture. Finding the right wood for the project is the hardest part. There are so many varieties of wood available that choosing one can be difficult.
The problem with wood is that not all wood properties are the same. Wooden can split or crack, while some woods may warp. These things should be considered before you buy wood.
What amount of money do I need to get started with my business?
Since every project differs, it is impossible to give exact numbers. These factors will help you get an estimate of how much money is needed.
-
Cost of materials
-
Tools and equipment
-
Time spent working on the project
-
Your hourly rate
-
How much profit do you expect to earn
-
You can hire help, regardless of whether you have a plan.
It's a good idea for beginners to start with small projects like frames and boxes. As you gain more experience, you will be able tackle more complicated projects.
How can you calculate the woodworking price?
It is essential to calculate costs as accurately as possible when pricing any project. It is important to ensure that you are getting the best materials prices. It is also important to consider the costs of other factors, such time, skill, and experience. If you want to get an idea of what you can expect to spend on different types of woodwork projects, check out our guide to the average price of common household DIY tasks.
Statistics
- The U.S. Bureau of Labor Statistics (BLS) estimates that the number of jobs for woodworkers will decline by 4% between 2019 and 2029. (indeed.com)
- Overall employment of woodworkers is projected to grow 8 percent from 2020 to 2030, about as fast as the average for all occupations. (bls.gov)
- The best-paid 10 percent make $76,000, while the lowest-paid 10 percent make $34,000. (zippia.com)
- In 2014, there were just over 237,000 jobs for all woodworkers, with other wood product manufacturing employing 23 percent; wood kitchen cabinets and countertop manufacturing employing 21 percent. (theartcareerproject.com)
External Links
How To
How to stain wood
Staining wood can be described as a process where chemicals are applied to the wood surface. This causes the wood to take on a new color. This chemical reaction causes wood to turn from whiteish to brownish. While oak is the most widely used type of wood for staining purposes, other types of wood are also available.
You can apply wood stains in many different ways. Mixing the stain in a solvent such as turpentine and spraying it onto the wood is one method. Other methods use a solution of water and dye applied directly to the wood. Stains can also be mixed into paints and varnishes, becoming part of the finish coating.
Preparing the wood surface is the first step to staining it. You must clean the wood well to remove any grease or dirt that might interfere with the application of the stain. Sanding can smoothen out scratches and uneven spots. Next, you need to decide which stain you want. Penetrating stains are different from non-penetrating. Penetrating and non-penetrating wood stains penetrate deeper than other types, making them perfect for dark colors like mahogany. Light colors such as maple work well with non-penetrating stain.
After choosing the type and application method you prefer, gather your tools. Because you can spread the stain evenly with a paintbrush, it is ideal for applying them. After you're done painting, make sure to have some rags handy to remove any excess stain. If you are planning to mix your stain, ensure you have enough containers for each component.
Once you have prepared all your materials, it is time to clean the areas where you will stain the wood. Use soap and warm water to remove dust and grime. Wipe down all furniture pieces with a dampened cloth and clean water. Be sure to get rid of all loose material, especially if staining is planned for darker wood.
Next, apply the stain. The stain can be applied by spraying or brushing the stain onto one end of the furniture. Slowly and carefully work your way along the grain to reach the opposite end. Be careful not to let the stain drip off the wood's edge. Before you proceed with the next steps, let the stain dry completely.
A coat of clear polyurethane sealing agent is applied to protect the paint. Three coats of polyurethane sealing agent are required. Allow the third coat to dry overnight, before sanding.