You can add color to wood carvings by using watercolor paint. The paint sinks into the wood, showing off the wood grain. You can choose to buy watercolor paint in tubes, or cakes. The latter are thicker, and more likely to drip. Be aware that water-based paints could be affected by dust and wood shavings. Apply a thin primer layer before you paint if you don't have much time.
Oil-based paints
Oil-based paints can be used to paint wood carvings. Some woods, like maple or birch, are better suited for oil-based painting. However, if you are painting a kitchen utensil, you may want to avoid oil-based paints. Oil-based paints can be used to carve wood.
Watercolors
It's a great project to use watercolour paints on wood. You can express your creativity and keep the wood intact. Watercolors have the advantage of not warping at the slightest touch. Watercolors do require some preparation. While sandpaper is a useful tool, you'll want to use a fine grit sandpaper for the center section of your wood carving. By doing this, watercolor pigments will shine through the wood and appear framed. For safety, you should wear protective eyewear and a dust-removal kit.
Gesso
You must prepare your piece before you start painting wood carvings. You can use either the student or artist grade of gesso. Student grade is typically white; artist grade is thicker. Acrylic paint can be added to more pigmented colors. To create the desired color, you will need a combination of gesso and paint. Once the gesso is dry, apply several thin coats with the paint.
Acrylic paints

If you're interested in creating beautiful pieces of art from wood, acrylic paints are a great choice for woodcarving projects. Acrylic paints stick to various types of wood and are non-toxic. Plus, they're non-toxic. They are ACMI certified, making it ideal for people with sensitive skin. These are some tips to help you choose acrylic paints to paint woodcarvings.
Oil-based oil paints mixed with gesso
Gesso, a mixture of animal glues (whiting) is the name. Gesso is usually white but can be found in colored, transparent, and black varieties. It will vary depending on which type you purchase. Some brands will work smoothly while others leave a matte finish. You should experiment with different types until you find the consistency you prefer. Liquitex Super Heavy Gesso makes it easy to create sculptural effects onto a canvas. Apply it using a palette blade.
Basswood panel
Prior to applying paint to your basswood panel, seal it first. Wood's natural substances can lead to paint deterioration. Sealers smoothen the wood surface and prevent paint from getting into wood pores. Properly sealing the wood will improve its durability. Here are some ways to protect your basswood panel. Use the correct sealer for your basswood panel.
Sealing coats
Use a sealer to protect wood carvings. Follow the instructions. Use a paintbrush for applying the sealer to the entire carving. Let the sealer dry completely in an open area before applying the next coat. Sand the carving lightly once the sealer is dry. Skip this step if you have very intricate carvings.
Using gesso
Preparing your wooden carving for painting is important. Apply gesso both to the front and back. This material absorbs more paint than student-grade gesso. It is often thinner than the latter. For greater pigmentation, you can mix it with acrylic painting. But it's not necessary. The thickness of the gesso is dependent on the amount of paint you plan to use.
Selecting the right wood
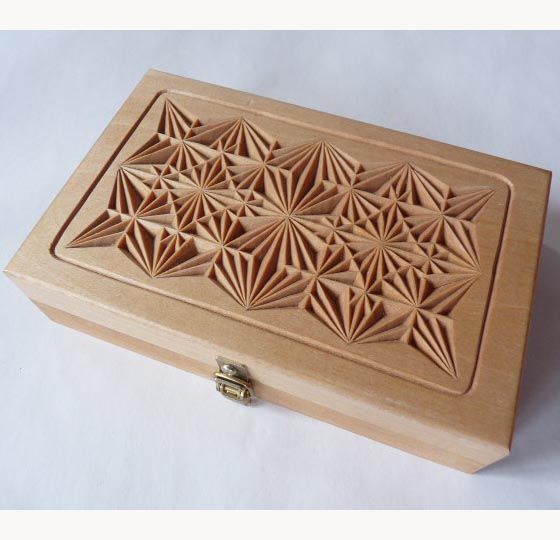
It is crucial to choose the right wood for wood carvings painting. Paint can have an impact on the dimensions of the piece. It is best to choose a light wood that is neutral in color. This will allow you paint over darker tones, and highlight those with more contrast. If the wood is too dark, you can paint over it with a darker color. You will need to choose neutral wood to paint, no matter how large or small the piece.
Pre-treatments
Many wood carvings come with the ability to be colored or painted. These works require pretreatment to stop oils and water from seeping into the wood. This is especially important for softwoods, such as basswood, that are very absorbent. Wood carvings can be painted with a wood-based paint. However, it is best to follow these guidelines to avoid potential problems. This article will show you how to pre-treat wood.
FAQ
Do you have any other information I should know about woodworking and/or the process of making it?
It's easy to underestimate the amount of work involved in making furniture. Finding the right kind of wood is the most difficult part. There are so many wood options that it can be difficult to choose the right one.
Another issue is that wood does not have the same properties. Some woods will warp and others will split or crack. You must take these things into consideration before purchasing wood.
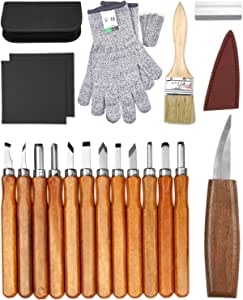
What type of tools does a carpenter use?
The most common tool used by carpenters is a hammer. A hammer is useful for driving nails into wood. It is also used to help hold pieces together while working on a job. Other tools include clamps.
Can I succeed in woodworking if I'm a genius?
No. Woodworking does not require any special skills. Anyone can learn how to use basic power tools and techniques to create beautiful works of art.
What type of wood should I choose?
The most commonly used woods for woodworking are oak, maple, cherry. Every type of wood is different and can have a unique look and feel that will affect the final product. For example, oak tends to be darker and harder than other woods. Birch is soft and lightweight, while mahogany is denser and heavier. There are two options: solid wood and veneers. Veneers are thin sheets or wood that are glued together into one layer.
How can a beginner woodworker make money?
Many people are beginning to learn how build furniture to launch an online business. If you are just starting to build furniture, there are many other ways to make money than selling on Etsy. Local craft fairs and events are great places to sell your products. You could also offer workshops to help others learn how to make their own furniture. Perhaps you have some experience as a carpenter/builder and would like to offer your services, such as remodeling homes and creating custom pieces.
What tools should you start with to become a woodworker
Woodworking is an art form that requires patience and practice. Learning how to use the various tools and techniques necessary for woodworking takes patience.
There are many woodworking tools on the current market. Some prefer to use power tools, while others prefer to use hand tools.
While you have the option to pick what you like, it is essential that you get the right tool for the job. It may be a good idea to start with a basic set, if possible, if you don’t know much about hand tools.
You might also consider learning how to use the router to create intricate shapes from wood. These tools can be purchased at most hardware stores.
Statistics
- The U.S. Bureau of Labor Statistics (BLS) estimates that the number of jobs for woodworkers will decline by 4% between 2019 and 2029. (indeed.com)
- Overall employment of woodworkers is projected to grow 8 percent from 2020 to 2030, about as fast as the average for all occupations. (bls.gov)
- Average lumber prices rose about 600 percent between April 2020 and May 2021. (familyhandyman.com)
- Woodworkers on the lower end of that spectrum, the bottom 10% to be exact, make roughly $24,000 a year, while the top 10% makes $108,000. (zippia.com)
External Links
How To
How to make wood joints
This tutorial will demonstrate how to join two pieces together of wood. The "pocket hole joint" is a method whereby we drill holes into the wood and glue them together. This method works great if your wood is straight and smooth. Try dowel joinery instead if your wood doesn't look straight. Here are the steps
-
Drill Pocket Hole Joints. First, measure the area where you wish to place the pocket joint. Use a jigsaw or handheld drilling machine to drill 3/8 inch deep holes at the ends of each wood piece.
-
Sand Smooth. Sanding the edges of the wood will help to prevent the joint from splitting later.
-
Glue together. Apply glue to both the ends of the wood. Allow it to cool for at least 5 minutes before you attach the pieces.
-
Clamp the Pieces Together. Once the glue has dried, clamp the pieces together so they are flush.
-
Trim Joinery. Trim any excess wood surrounding the joint once the glue has dried completely.
Allow enough space between pieces so you can turn them inside out.