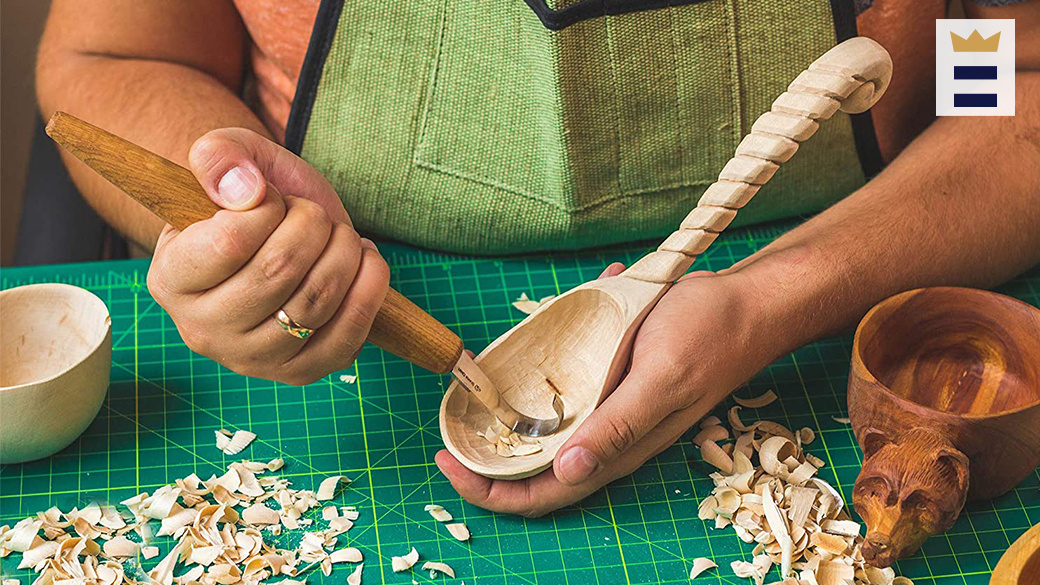
A beginner woodcarver might not know where to begin. These are some tips to help you start your first project in animal carving.
Dog
There are many free wood carving patterns that you can download for your dog if it's an aspiring woodcarver. These patterns will guide you in carving your dog in a variety of styles and dimensions. Here are some tools that will be needed to carve your dog. A band saw or copingsaw, chisels and a mallet are all you will need. You also need some time to sharpen them. Next, you will be ready for carving!
Eagle
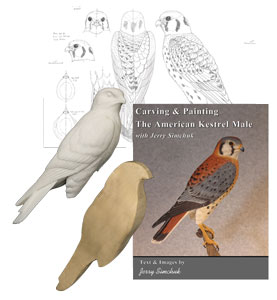
Native Americans consider the bald eagle a symbol of strength, courage and wisdom. Its primary purpose was to be the creator's messenger. It measures approximately 20 inches in size and 5 inches wide. The eagle today is a popular choice in wood carvings. There are a wide variety of woods for eagle carvings, from modern to antique. This article will show you some of the most common wood carving styles.
Bear
Carving a bear from wood is a relatively straightforward project, and it has a few distinguishing lines and shapes. Each line is heavier than the previous. The front paws of a bear are angled opposite the leg lines for added visual interest. Consider buying a book to help you learn how to carve a bear if wood carving is new to you. James Miller's book demonstrates the whole process.
Elephant
An elephant wood carving adds character and beauty to any home. 1stDibs offers 56 antique carved wood elephants, as well as two modern pieces. These pieces are a classic design that dates back to the 19th Century and have seen increasing popularity in recent times. You have the option to choose from Art Deco or Mid-Century Modern styles. Or, you can pick a smaller piece that will add a subtle touch of elegance to your home.
Moose
You can carve a moose head or antlers by using moose antlers. Dowels can hold moose antlers or paddles. Then push them in or glue them. The moose can be painted with a walnut gel stain and/or colored with paint.
Template for the Moose
A moose carving templates helps carvers to create realistic-looking carvings. Moose carvings are easy to paint and stain with walnut gel stain. After you've learned the basics it is simple to carve this creature. Finish the job by adding details such as fur or eyes using a brush. The Moose template can be used by beginner wood carvers to create an animal.
Bear template
You will need a template to start a bear wood carving. Next, you will need a Dremel tool for exploring the wood features. With this tool, you can use stop cuts to separate the legs from the lower body. You can also make small V-cuts in the legs to indicate where they will split. Once you are done with the leg and ear sections, you can finish the underbelly. For the bear's final shape, you will need to leave some space at its back.
Eagle template
To carve an eagle, you will need three detailed templates. One is for actual carving. The other serves as your work paper template. You can cut it off to make transfer patterns. As a reference, the third template will be used. Then you will need to use the templates as a reference. Cut the lines so that they are close to the pattern. Make sure all marks are aligned.
Template for mouse
There are many designs available for wood carving beginners. This task will be easier if you use a template. You can also download patterns to assist you. For beginners, you can begin with a basic geometric pattern. As you get more experience, you can start with simpler patterns. Once you master the basics of mouse design, you'll be well on your way to designing the perfect mouse.
FAQ
You can learn how to woodwork.
It is best to do it yourself. Woodworking takes practice, skill, patience and experience. Any craft requires patience to master.
You can learn the most effective way to master a skill is by actually doing it. So start small and build on what you have learned from there.
How can I tell what kind of wood I am working with?
Always inspect the label when buying wood. It should have information about the wood species as well its moisture content and whether any preservatives were used.
What kind wood should I use for my project?
There are many wood types that are used in woodworking, including oak, maple and birch. Each wood type has its own characteristics which affect the final product's appearance and feel. Oak, for instance, is darker and harder than most other woods. Birch is soft and light, and mahogany is denseer and heavier. You can also pick between veneers and solid wood. Veneers are thin wood sheets that are glued together to form one layer.
How much should a woodworker charge per hour?
The hourly rate for a professional Woodworker will vary depending on many variables, such as experience, skill level and availability.
The average hourly rate for a skilled woodworker ranges from $20-$50 an hour.
A woodworker with less experience may be able to charge $10 an hour.
What is the difference between a hobbyist or a professional woodworker, and how can you tell?
Hobbyists enjoy making things out of wood, whereas professionals focus more on the quality of their work. Hobbyists tend to take pride and share their creations with family and friends. Professionals will spend hours looking at designs before they start to build a project. They'll be meticulous about every aspect of their work, from choosing the best materials to finishing it perfectly.
Is there a way to start my own woodworking company?
It is not easy to start a woodworking business. There are many laws and regulations you need to be aware of. But, this doesn't mean you need to go through all of the trouble of setting up your business. Many people choose to join existing businesses. You only need to pay membership and tax fees.
Statistics
- Average lumber prices rose about 600 percent between April 2020 and May 2021. (familyhandyman.com)
- The U.S. Bureau of Labor Statistics (BLS) estimates that the number of jobs for woodworkers will decline by 4% between 2019 and 2029. (indeed.com)
- The best-paid 10 percent make $76,000, while the lowest-paid 10 percent make $34,000. (zippia.com)
- If your lumber isn't as dry as you would like when you purchase it (over 22% in Glen Huey's opinion…probably over 10-15% in my opinion), then it's a good idea to let it acclimate to your workshop for a couple of weeks. (woodandshop.com)
External Links
How To
Tips on how to drive a nail in wood
It is essential to pick the right size and style of hammer before you can drive a nail in wood. Claw hammers include mallets, claw hammers (sledgehammers), mallets, ball-peen hammers, hatchets, and mallets. Each kind of hammer has its own advantages and disadvantages. For example, a claw hammer works best when you want to hit something hard, like nails; however, it's difficult to control precisely where the blow lands. A sledgehammer allows you to hit large areas simultaneously, but it is too heavy and cumbersome to use for small tasks.
Place your hand flat on the side of your chosen hammer so that the handle rests in your palm. Grab the handle tightly, but do not squeeze too hard. Keep your wrist relaxed and the hammer straight up. Now, move the hammer towards the center of the nail by swinging it back. You should feel the impact of the hammer striking the nail. Try swinging a hammer using a block wood to practice until you are comfortable.
Hold the hammer near your body until you're ready for the nail to be driven. To ensure that the nail is perpendicular on the surface of the wooden floor, position it. Your eyes should be focused on the nail's tip. Move the hammer forward and then continue to move the hammerhead. Continue this motion several times, slowly increasing the speed of each swing. Once you've mastered the technique, try adding power to your swings. Try holding the hammer above your shoulder and bring it down forcefully. You'll have more energy to work with.
Once you have successfully drilled the first hole in the nail, remove the hammer. You can then remove the rest of the nails using a prybar or a screwdriver. To avoid splitting the wood, make sure the nail heads are not touching the board's surface.